Work summary 07/28/2017

Monday 07/24

Finish user study survey.

Tuesday 07/25

Revised user study.

Try interpolation

Wednesday 07.26

Finish interpolation, try to debug the strange lines (failed)

Thursday 07/27

Solve the bug 306 & 400 for vive by:

  • disconnect the usb, hdmi and power.
  • steamVR->Settings -> disconnect all usb devices
  • Reboot the laptop
  • steamVR->Settings -> enable direct mode
  • connect the usb, hdmi and power.

Go to GLAO and ask about the parking ticket.

Try TAA with variance sampling to solve the flickers.

581. Shortest Unsorted Continuous Subarray

Description:

https://leetcode.com/problems/shortest-unsorted-continuous-subarray/#/description

Algorithm:

Only need to care about the start index and end index

Code:

Time & Space:
O(n) & O(1)

289. Game of Life

Description:

https://leetcode.com/problems/game-of-life/#/description

Algorithm:

Use state machine to finish in-place.

Code:

Time & Space:

O(n) & O(1)

User study research

Foveated 3D Graphics

  1. 3 Tests: pair test, ramp test, slider test
    1. pair test: designed to interrogate what foveation quality level was comparable to non-foveated rendering
      1. Each 8 seconds long and separated by a short interval (0.5s) of black, in both orders
      2. Question:whether the first rendering was better, the second was better, or the two were the same quality.
      3. Quality range from j = 8 (low quality) to j = 22 (high quality).
    2. ramp test: designed to find the lowest foveation quality perceived to be equivalent to a high quality setting in the absence of abrupt transitions
      1. sampled using 5 discrete steps, each 5 seconds long and separated by a short interval of black, in both orders
      2. Question: whether the quality had increased, decreased, or remained the same over each sequence.
      3. Quality j1 ={ 4; 5; 7; 10; 12; 15; 17; 22}.
    3. silder test: let users navigate the foveation quality space themselves to find a quality level equivalent to the nonfoveated reference
      1. Start from lowest quality, increase until the participant feels the same quality.
      2. recorded the first quality level index at which users stopped increasing the level and instead compared it to the reference.
      3. Test the effect of animation speed on the demand for foveation quality.
      4. 8 different camera motions. Each camera motion was presented to each subject twice, for a total of 16 separate slider tests.
  2. Tools:
    1. 1080p monitor & Tobii X50 eye tracker sampling at 50Hz with 35ms latency
  3. Scene:
    1. moving camera through static 3D scene.
    2. The non-foveated reference renders at about 40Hz
  4. Participant:
    1. 15 subjects
    2. age from 18 to 48
    3. Six of the subjects had corrected vision; five wore contact lenses (1, 5, 7, 8, 9, marked in light green in theresult plots) and one wore glasses (2, marked in dark green). Subjects 4, 6, and 15 (marked in yellow) required multiple calibration sessions with the eye tracker, indicating that eye tracking may not have been as accurate for them as is typical.
  5. Results:
    1. as shown in Figure3, 4, 5, 6 in original paper.

Coarse Pixel Shading

No user test

Towards Foveated Rendering for Gaze-Tracked Virtual Reality

Pre-User study: Prove the hypothesis that using temporally stable and contrast preserving foveation could improve the threshold. The detail of shading rate choice is not clear in the paper. Needs supplemental material.

  1. Design user study to compare the relative detect-ability of the 3 foveation strategies:  aliased foveation, temporally stable foveation, and temporally stable and contrast preserving foveation.
    1. designed to help determine the threshold foveation rate for each strategy
      1. Each 8 seconds long and separated by a short interval (0.75s) of black, in one order:  first (foveated version), second (non-foveated version)
      2. Question:whether the first (foveated version) rendering was better, or the second (non-foveated version) was better (two-alternative forced choice (2AFC) )
  2. Tools:
    1. Oculus Development Kit 2 & SMI eye tracker
    2. LCD monitor with resolution of 2560×1440 with a head-mounted gaze tracker (Eyelink2 by SR Research), which estimates gaze at 250 Hz with an accuracy of < 1°, and a photon-to-machine latency of 5 ms.
  3. Scene:
    1. CrytekSponza(courtesy of Frank Meinl and Efgeni Bischoff); 
      1. For desktop: maintained the viewpoint—camera location and orientation, and instructed each participant to maintain their gaze near the center of the display all the time
      2. For HMD: asked them to try to maintain a nearly constant viewing direction.
  4. Participant:
    1. 4 subjects
    2. age from 26 to 46
    3. corrected vision, and no history of visual deficiency
  5. Results:
    1. The threshold for using temporally stable and contrast preserving foveation is 2x better than temporally stable and approx, 3x better than aliased foveation.

Post-User study: Verify that our rendering system indeed achieves the superior image quality predicted by our perceptual target. Instead of estimating a threshold rate of foveation, we estimate the threshold size of the intermediate region between the inner (foveal) and the outer (peripheral) regions.

  1. Design user study to compare their algorithm with guenter.
    1. designed to help determine the threshold foveation rate for each strategy
      1. Each 8 seconds long and separated by a short interval (0.75s) of black, in one order:  first (foveated version), second (non-foveated version)
      2. Question:whether the first (foveated version) rendering was better, or the second (non-foveated version) was better (two-alternative forced choice (2AFC) )
  2. Tools:
    1. Oculus Development Kit 2 & SMI eye tracker
    2. LCD monitor with resolution of 2560×1440 with a head-mounted gaze tracker (Eyelink2 by SR Research), which estimates gaze at 250 Hz with an accuracy of < 1°, and a photon-to-machine latency of 5 ms.
  3. Scene:
    1. CrytekSponza(courtesy of Frank Meinl and Efgeni Bischoff); 
      1. For desktop: maintained the viewpoint—camera location and orientation, and instructed each participant to maintain their gaze near the center of the display all the time
  4. Participant:
    1. 4 subjects (different subjects from the pre-user study)
    2. age from 26 to 46
    3. corrected vision, and no history of visual deficiency
  5. Results:
    1. Their system is better than Guenter.
    2. In practice, we find that we can often reduce the transition region to around 5° before artifacts become prominent. While we can tell differences between non-foveated and foveated images in such a configuration, the foveated images are in acceptable in isolation.

Adaptive Image‐Space Sampling for Gaze‐Contingent Real‐time Rendering

  • performed targeting different aspects of our proposed technique.
    1. Designed to interrogate what foveation quality level was comparable to non-foveated rendering
      1. T1 Cognitive load: The goal of this test was to draw the attention of the user to a specific and comparable task
        1. pre-defined camera track within 20 seconds, 6 trials per test in which the respective test parameter was randomly activated or deactivated.
        2. After each trial, display a gray screen with a marker to focus the user’s view on the screen center again.
        3. Question:whether the first rendering was better, the second was better, or the two were the same quality.
      2. T2 Free viewing: freely explore the environment without having a specific task which could make it easier to detect quality differences.
        1. free moving of 8 seconds, 6 trials per test in which the respective test parameter was randomly activated or deactivated.
        2. After each trial, display a gray screen with a marker to focus the user’s view on the screen center again.
        3. Question:whether the first rendering was better, the second was better, or the two were the same quality.
      3. T3 Toggle manually: user was able to toggle manually between our sampling and the reference as often as desired
        1. free moving for unlimited time. 1 trial per test.
        2. Question:whether the first rendering was better, the second was better, or the two were the same quality.
      4. T4 Brightness adaptation: asked to test our eye adaptation feature
        1. 6 trials per test in randomly activated or deactivated adaptive sample reduction for over- and under-exposed image regions in each trial.
        2. Question:whether the first rendering was better, the second was better, or the two were the same quality.
        3. After each trial, display a gray screen with a marker to focus the user’s view on the screen center again.
      5. T5 Eye motion: examine if the user perceives the reduced amount of detail in image parts moving differently to gaze motion.
        1. asked the user to focus on a sphere moving into the virtual environment for 8 seconds randomly activated/deactivated eye motion-based sampling, 6 trials
        2. Question:whether the first rendering was better, the second was better, or the two were the same quality.
        3. After each trial, display a gray screen with a marker to focus the user’s view on the screen center again.
      6. T6 Texture adaptation: validate that the acuity-based peripheral textural detail reduction is not perceivable by the user.
        1. randomly switch our texture adaptation feature on and off while the user was freely exploring the environment, umlimited time, 1 trial
        2. Question:whether the first rendering was better, the second was better, or the two were the same quality.
  • Tools:
    1. Desktop computer with an i7-4930K CPU and NVIDIA GTX 780 Ti graphics card with 3GB of GPU memory.
    2. Displayed on a headmounted display with vertical field-of-view is 100 degree with a screen resolution of 1280×1440 pixels per eye and display refresh-rate of 60 Hz.
    3. Integrated binocular eye-tracking with an effective output sampling rate of 75 Hz and with a precision of around 1 degree viewing angle. The measured latency of the eye-tracker is 12.5 ms. A worst-case latency of around 50ms may happen right after saccading eye motion before the system adjusts itself correctly again.
  • Scene:
    1. The Cerberus scene (contains many specular highlights)
    2. The Crytek Atrium (contains complex light situations)
    3. The Mothership scene (containing a high amount of geometric detail)
  • Participant:
    1. 16 subjects
    2. not been informed about the strategy of our method
    3. normal or corrected-to-normal vision
  • Results:

Foveated Real‐Time Ray Tracing for Head‐Mounted Displays

  • 4 scenes x4 FRC (foveated rendering configuration) x3 fixation types. Each participant completed 96 trials in randomized order and each trial consisted of an 8-second-flight with one factor combination.
    1. Test1: designed to test whether subjects can differentiate between scenes with varying graphical contexts, rendered with and without our foveated rendering method.
      1. Each 8 seconds long and separated by a short interval (0.5s) of black, in both orders
      2. Question:whether the first rendering was better, the second was better, or the two were the same quality.
      3. Quality range from j = 8 (low quality) to j = 22 (high quality).
    2. Test2: designed to test whether modifications of the foveal region parameters in the ray generation have an effect on the perceived visual quality.
      1. Each 8 seconds long and separated by a short interval (0.5s) of black, in both orders
      2. Question:whether the first rendering was better, the second was better, or the two were the same quality.
      3. Quality range from j = 8 (low quality) to j = 22 (high quality).
    3. Test1: designed to test whether the fixation type have an effec on the preceived visual quality.
      1. Each 8 seconds long and separated by a short interval (0.5s) of black, in both orders
      2. Question:whether the first rendering was better, the second was better, or the two were the same quality.
      3. Quality range from j = 8 (low quality) to j = 22 (high quality).
  • Tools:
    1.  Intel Core i7-3820 CPU, 64GiB of RAM and a NVIDIA GeForce Titan X driving a Oculus Rift DK2
  • Scene:
    1. Sibenik, Rungholt, Urban Sprawl
  • Participant:
    1. 15 subjects (all with academic background)
    2. age from 26 to 51
    3. with normal or correctedto-normal vision
  • Results:

Install Dlib on Visual Studio 2015

Step1: Download Dlib

Step2: Use cmake to generate library

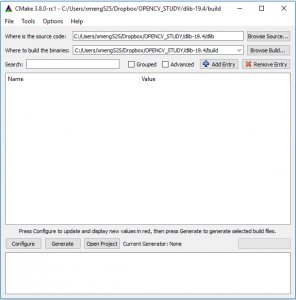
  • Use cmake to build the library. Set the directories as shown in the Figure 1 below
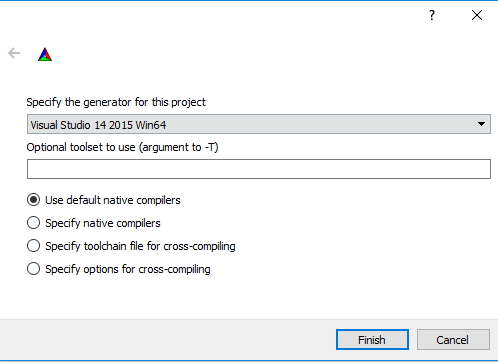
  • Click “Generate” and set the configuration as shown in Figure 2
  • Click “Finish”
  • Go to “C:/Users/xmeng525/Dropbox/OPENCV_STUDY/dlib-19.4/build”, open the Dlib solution
  • Run the “ALL_BUILD” project to under “Release x64” and “Debug x64”
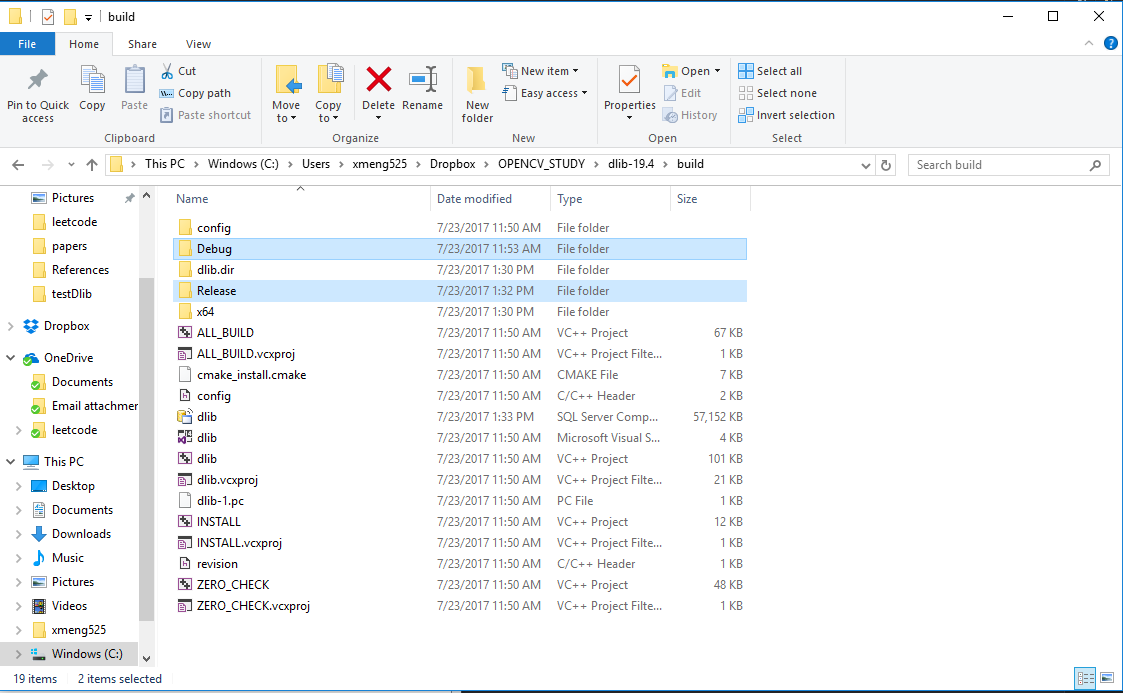
  • You will get “Debug” and “Release” folders as shown in Figure 3, containing “dlib.lib”


Figure 1


Figure 2

Figure 3

Step3: Build a new win32 console Application for testing.

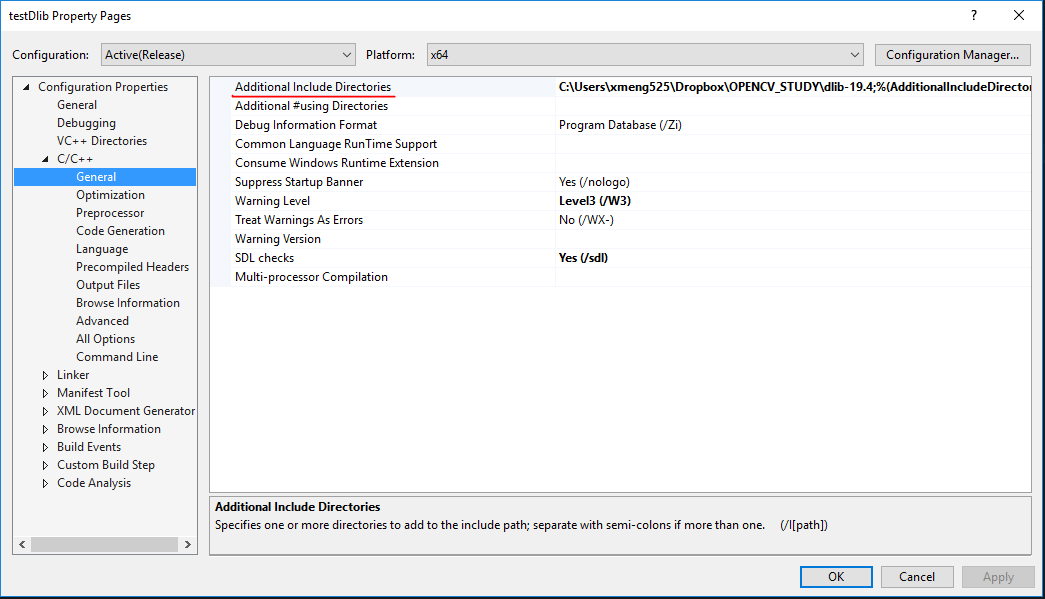
  • Add “VC++ Directories”
  • Change “C/C++ / General”
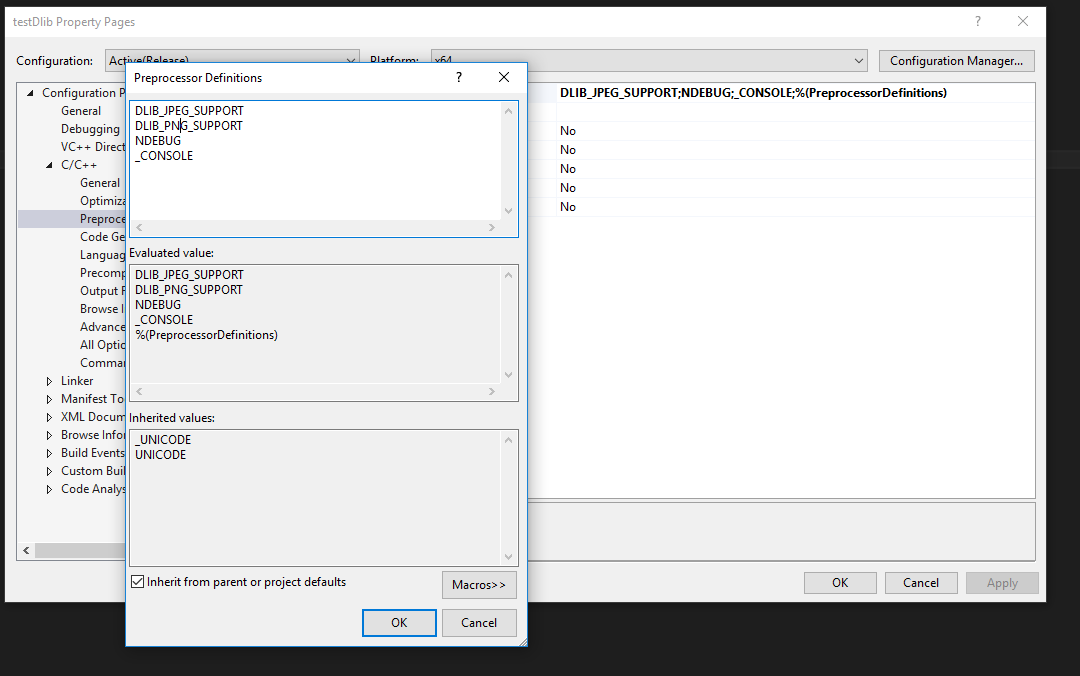
  • Change “C/C++ / Preprocessor”, add “DLIB_JPEG_SUPPORT” and “DLIB_PNG_SUPPORT”
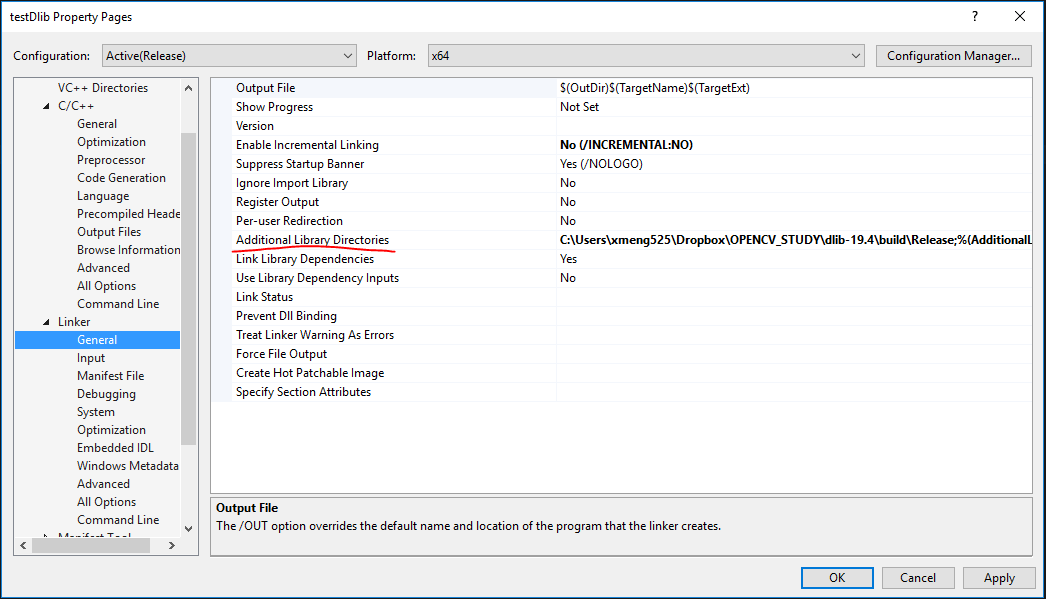
  • Change “Linker/General/Additional Library Directories” to the directory with “Dlib.lib”
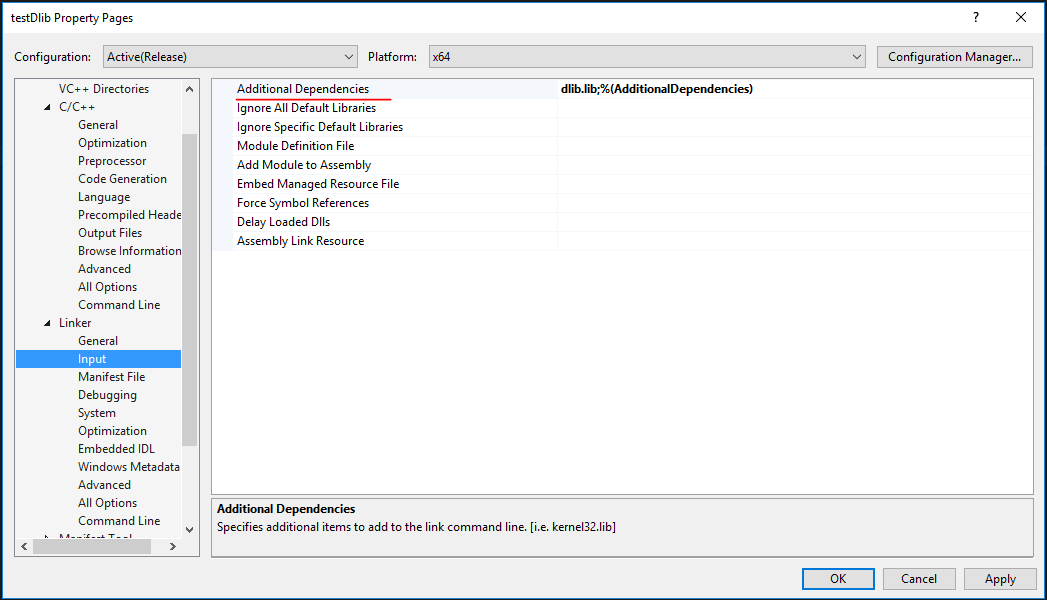
  • Change “Linker/ Input”

Step4: Testing.

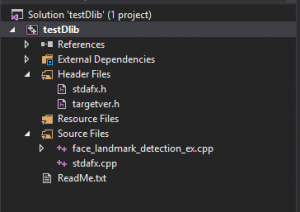
  • Build a testing file “face_landmark_detection_ex.cpp” as shown in the figure below.
  • Copy the following code to the main file


  • Run, if there is error:
    “USER_ERROR__missing_dlib_all_source_cpp_file__OR__inconsistent_use_of_DEBUG_or_ENABLE_ASSERTS_preprocessor_directives”

    • Go to C:\Users\xmeng525\Dropbox\OPENCV_STUDY\dlib-19.4\dlib\threads\threads_kernel_shared.h
    • Comment the following code:

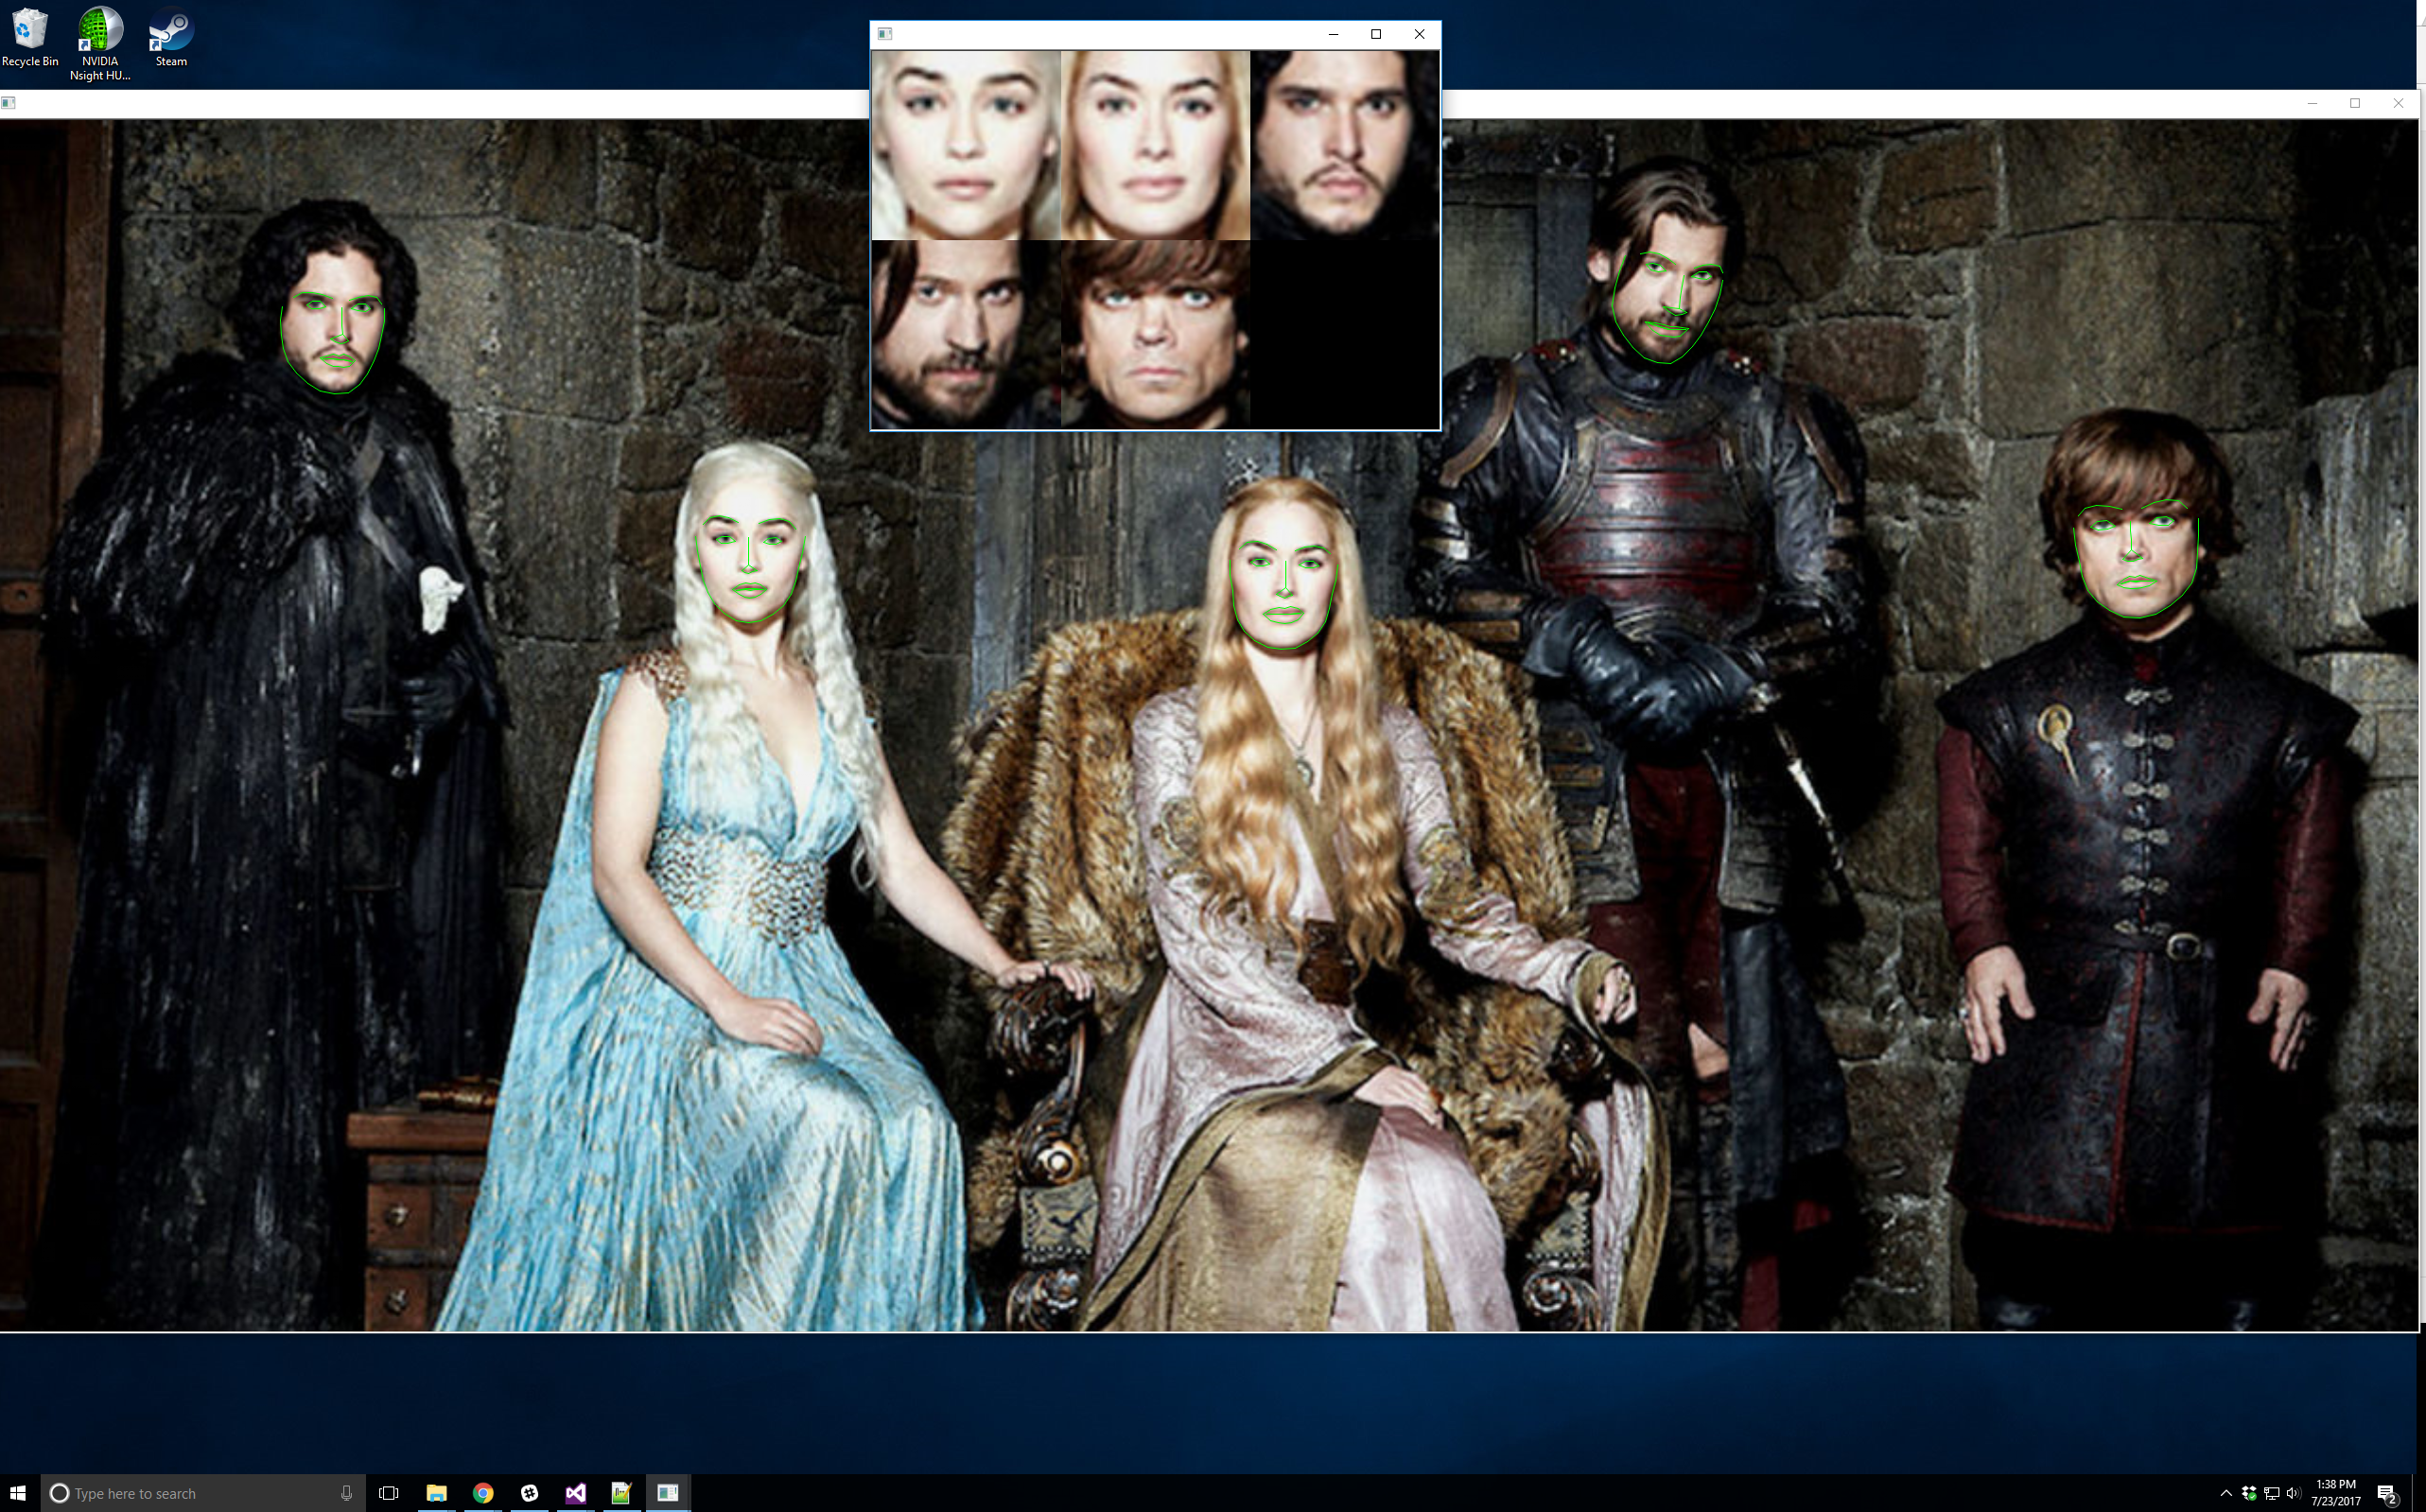
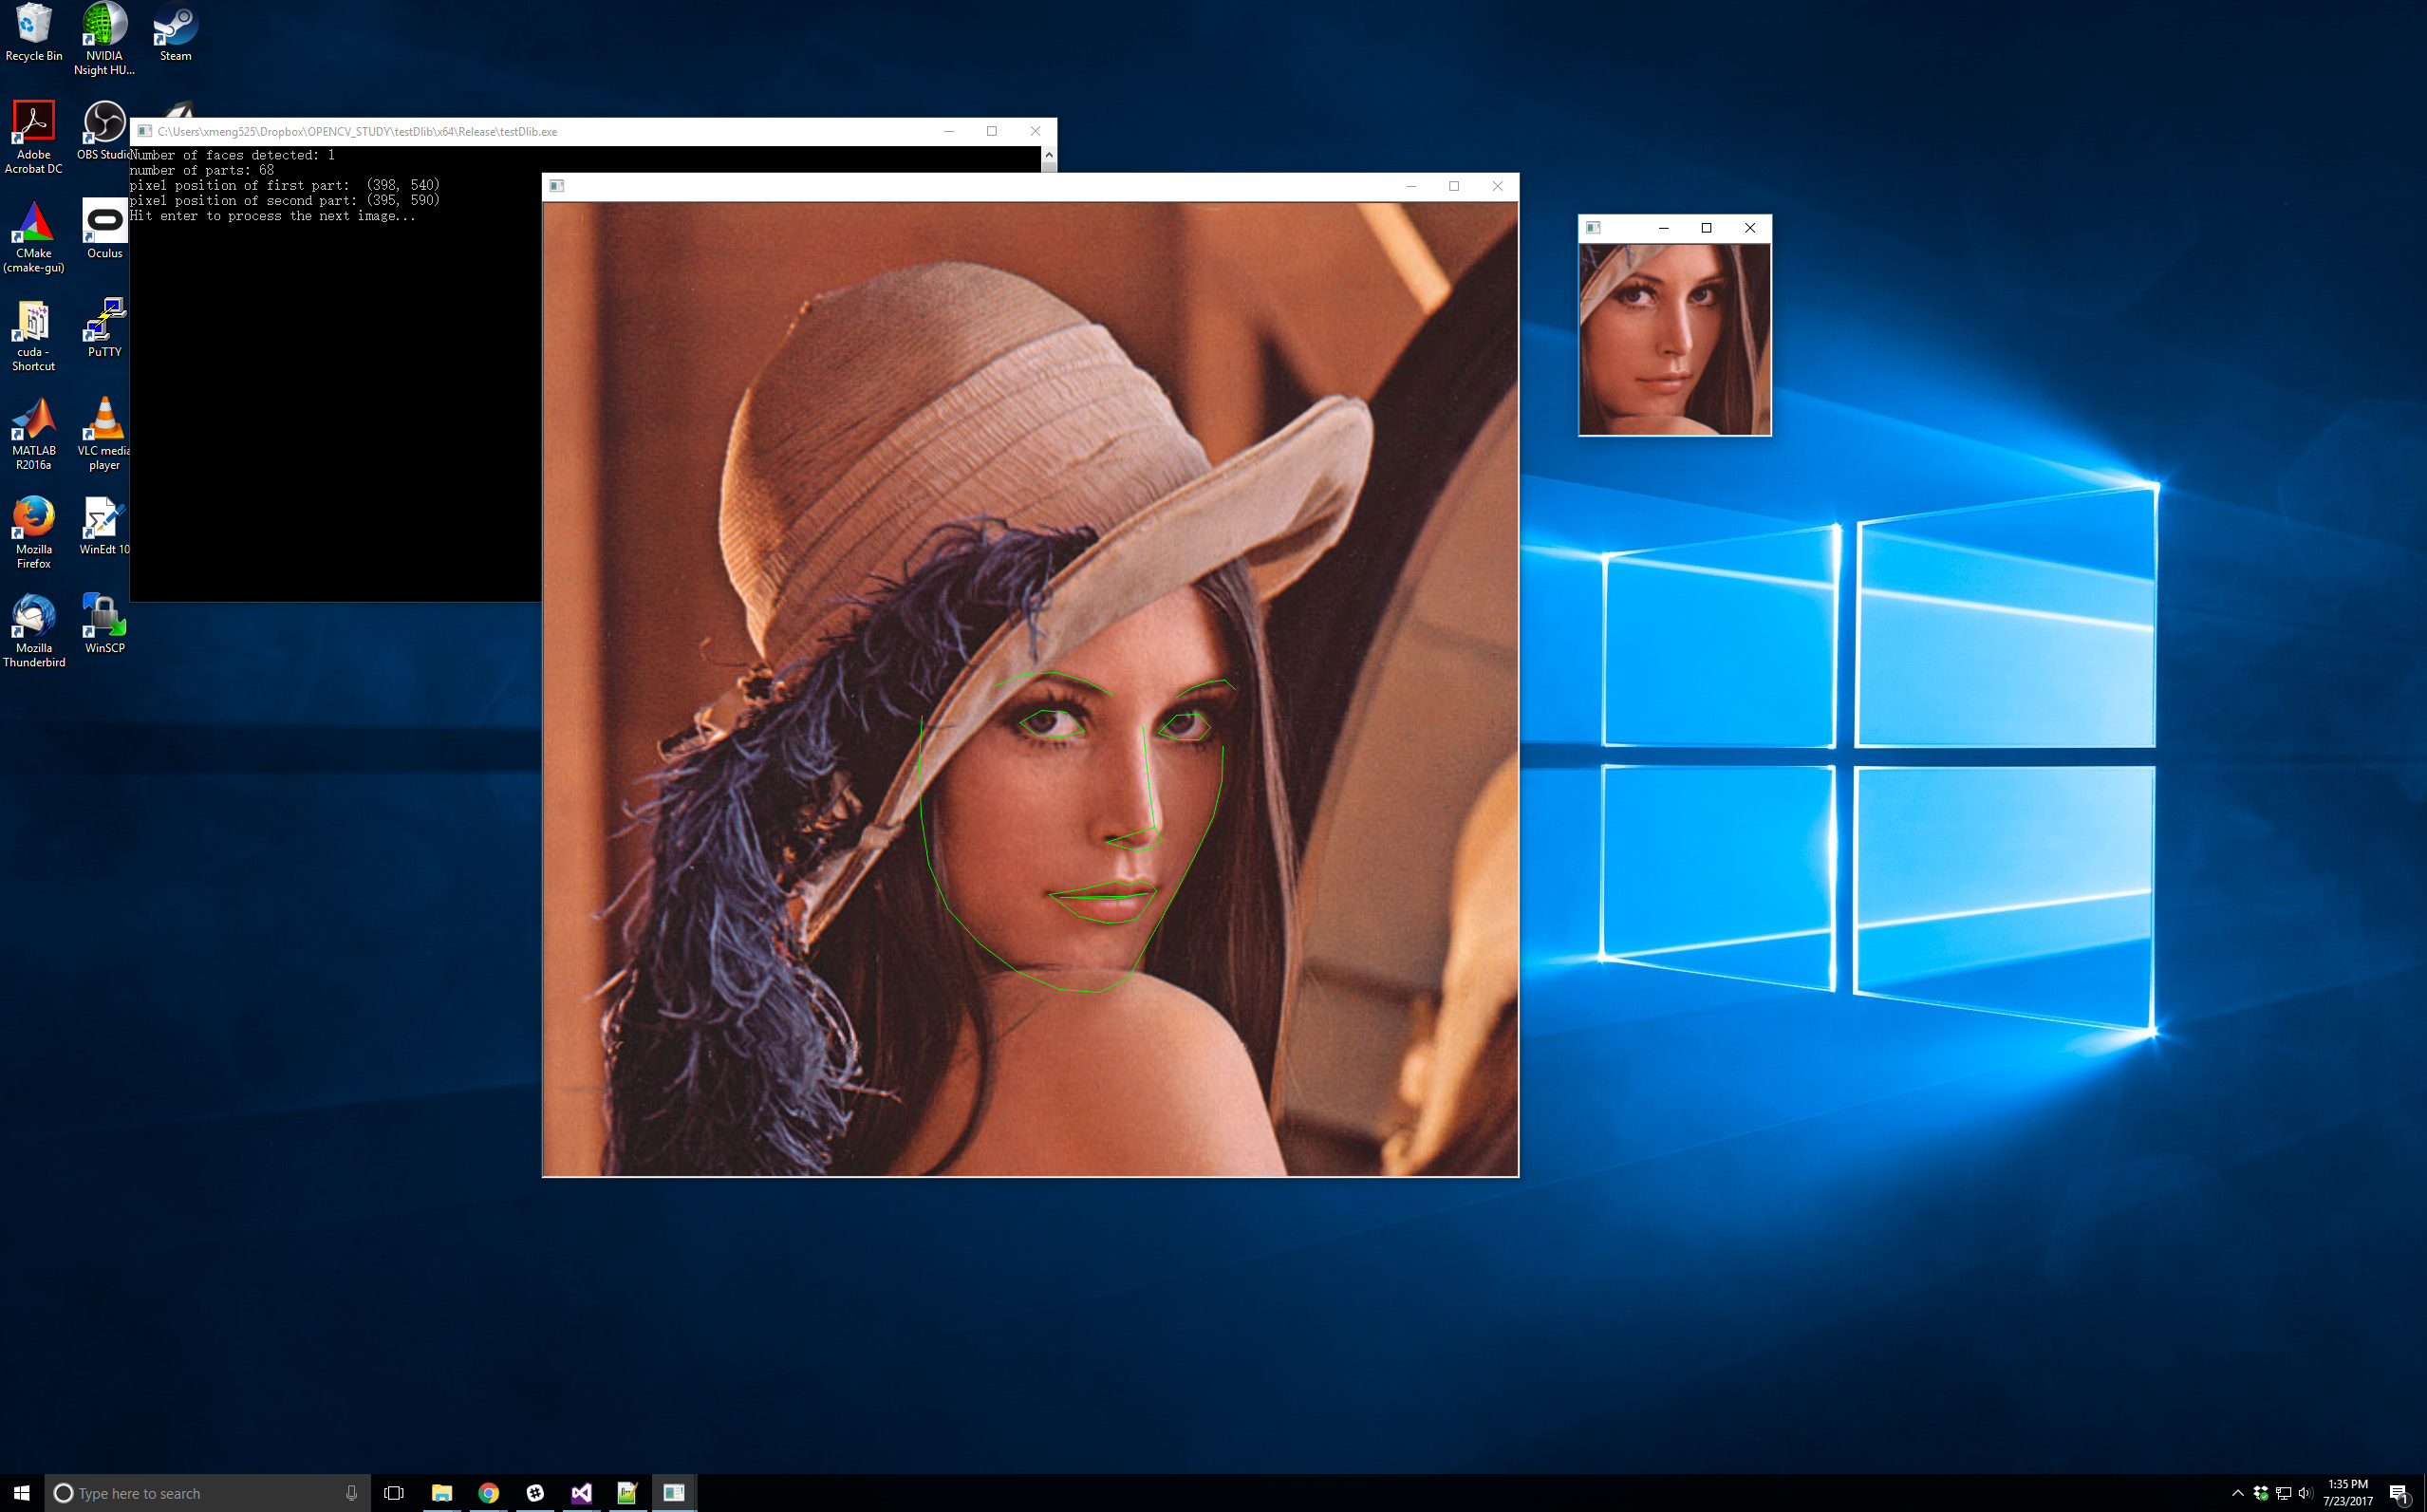
Step5: Get results

283. Move Zeroes

Description:

https://leetcode.com/problems/move-zeroes/#/description

Algorithm:

  1. Use swap.

Code:

Time & Space:
O(n) & O(1)

268. Missing Number

Description:

https://leetcode.com/problems/missing-number/#/description

Algorithm:

  1. Use sum as shown in Code1.
  2. Use XOR

Code1:

Code2:

Time & Space:
O(n) & O(1)

238. Product of Array Except Self

Description:

https://leetcode.com/problems/product-of-array-except-self/#/description

Algorithm:

As shown in Code.

Code1 (62ms, beats 20.95%):

class Solution {
public:
vector<int> productExceptSelf(vector<int>& nums) {
int n = nums.size();
vector<int> fromLeft = vector<int>(n, 1);
vector<int> fromRight = vector<int>(n, 1);
vector<int> result = vector<int>(n, 1);

for (int i = 1; i < nums.size();i++)
{
fromLeft[i] = nums[i – 1] * fromLeft[i – 1];
}
for (int i = nums.size() – 2; i >= 0;i–)
{
fromRight[i] = nums[i + 1] * fromRight[i + 1];
}

for (int i = 0; i < nums.size();i++)
{
result[i] = fromLeft[i] * fromRight[i];
}
return result;
}
};

Code2 (46ms, fastest):

class Solution {
public:
vector<int> productExceptSelf(vector<int>& nums) {

vector<int> res;

res.push_back(1);

for(int i = 1; i<nums.size(); i++){

int temp = res[i-1]*nums[i-1];

res.push_back(temp);

}

int right = 1;

for(int i = nums.size()-1; i>=0; i–){

res[i] *= right;

right *= nums[i];

}

return res;

}
};