Step1: Download Dlib
- Download Dlib from http://dlib.net/ and extract.
- Download face landmark detection predictor data http://dlib.net/files/shape_predictor_68_face_landmarks.dat.bz2
Step2: Use cmake to generate library
- Use cmake to build the library. Set the directories as shown in the Figure 1 below
- Click “Generate” and set the configuration as shown in Figure 2
- Click “Finish”
- Go to “C:/Users/xmeng525/Dropbox/OPENCV_STUDY/dlib-19.4/build”, open the Dlib solution
- Run the “ALL_BUILD” project to under “Release x64” and “Debug x64”
- You will get “Debug” and “Release” folders as shown in Figure 3, containing “dlib.lib”
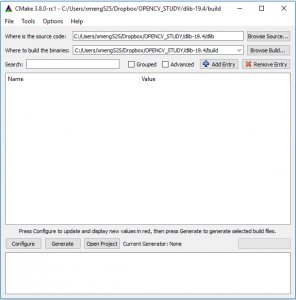
Figure 1
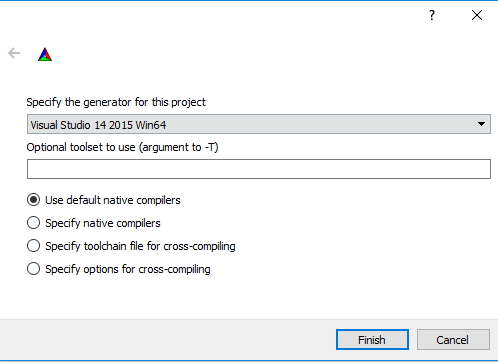
Figure 2

Figure 3
Step3: Build a new win32 console Application for testing.
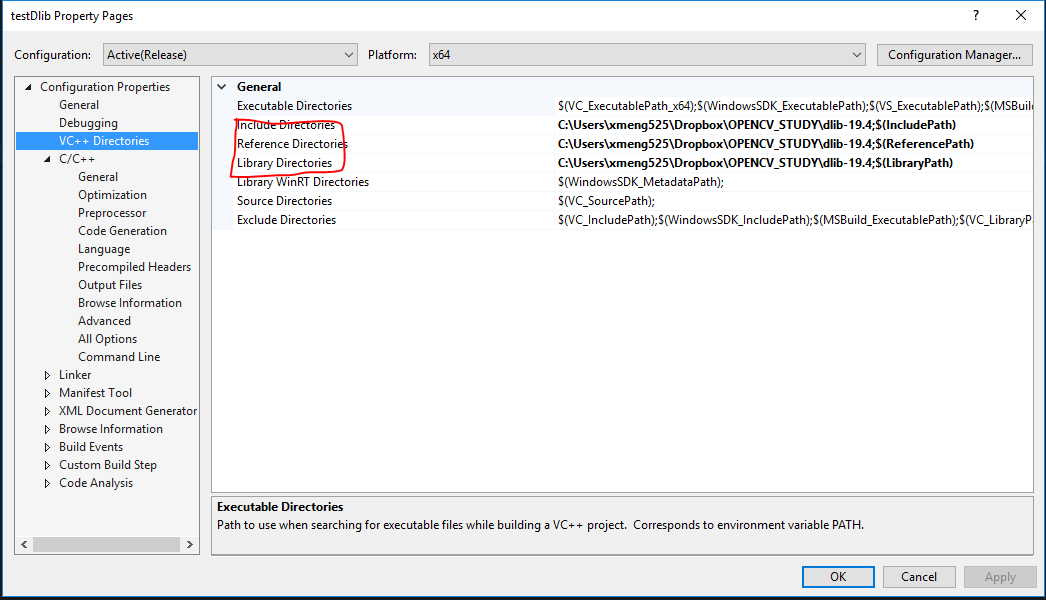
- Add “VC++ Directories”
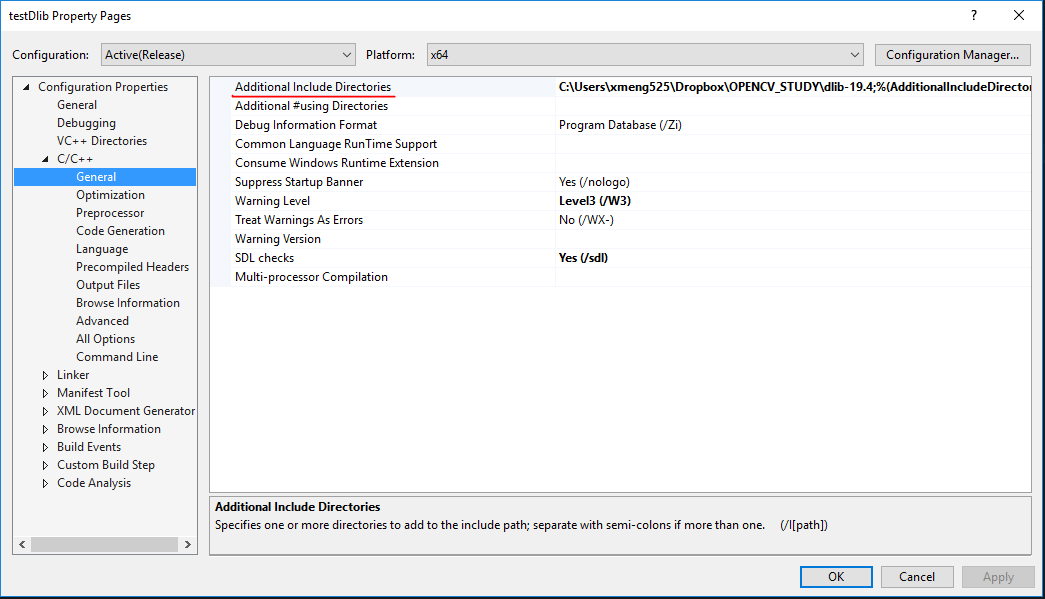
- Change “C/C++ / General”
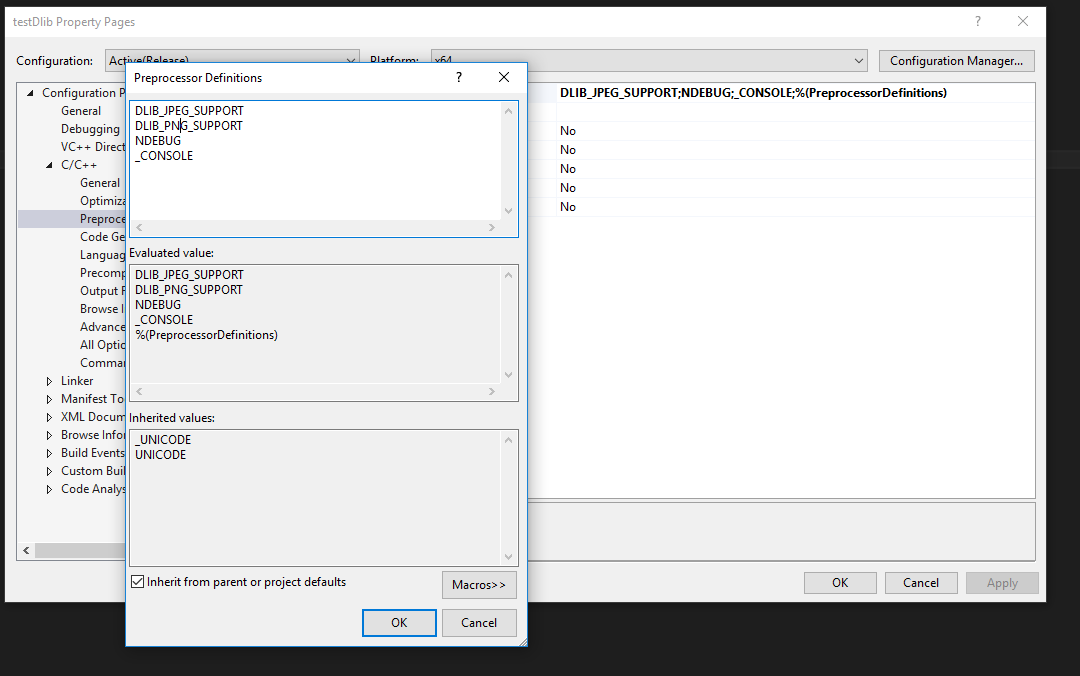
- Change “C/C++ / Preprocessor”, add “DLIB_JPEG_SUPPORT” and “DLIB_PNG_SUPPORT”
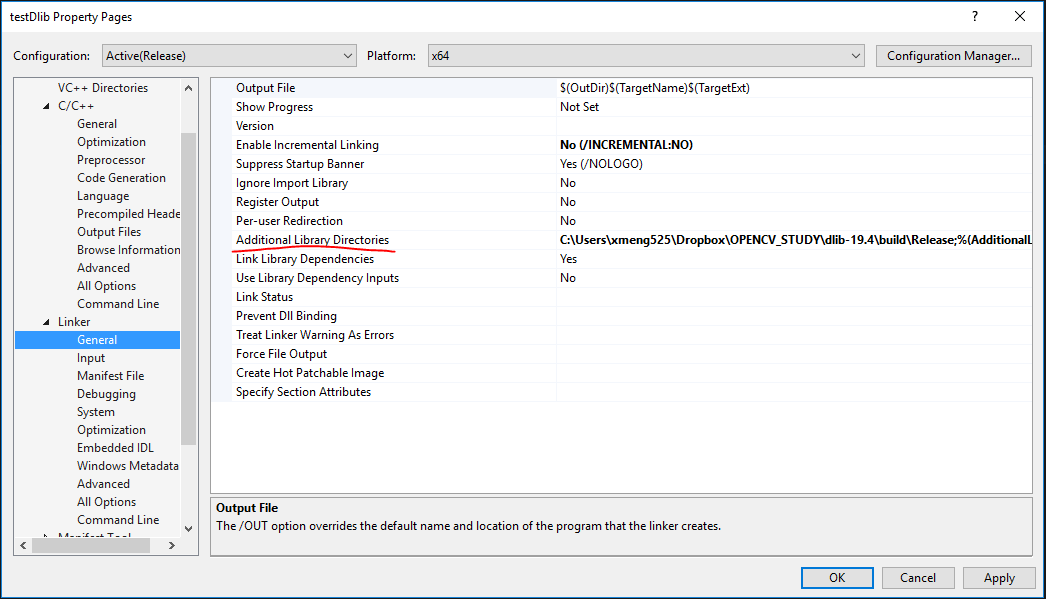
- Change “Linker/General/Additional Library Directories” to the directory with “Dlib.lib”
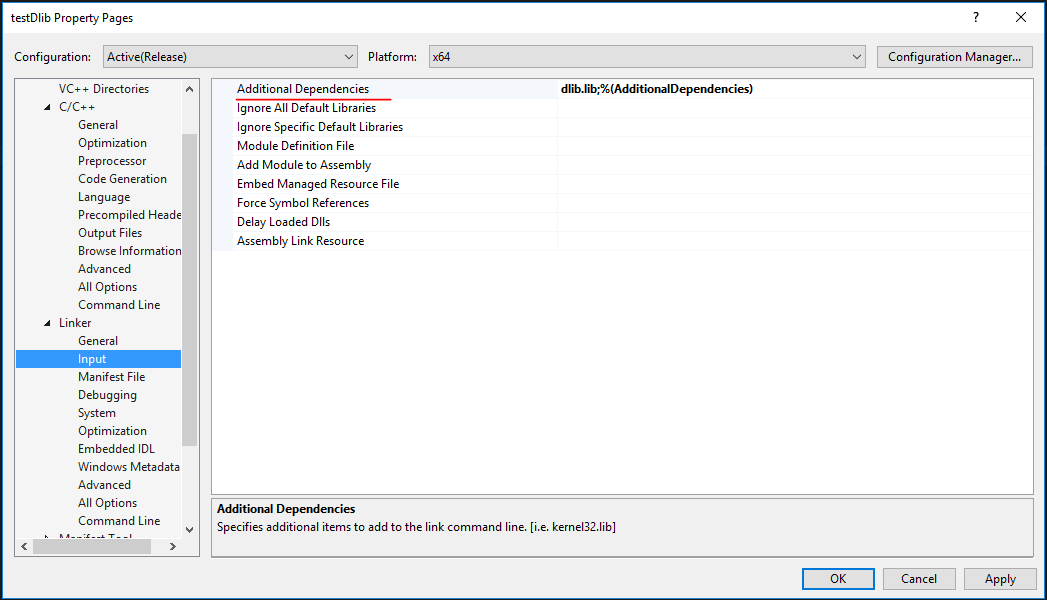
- Change “Linker/ Input”
Step4: Testing.
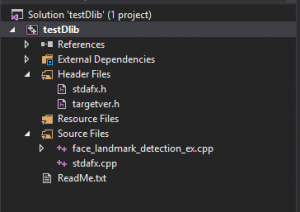
- Build a testing file “face_landmark_detection_ex.cpp” as shown in the figure below.
- Copy the following code to the main file
|
1 2 3 4 5 6 7 8 9 10 11 12 13 14 15 16 17 18 19 20 21 22 23 24 25 26 27 28 29 30 31 32 33 34 35 36 37 38 39 40 41 42 43 44 45 46 47 48 49 50 51 52 53 54 55 56 57 58 59 60 61 62 63 64 65 66 67 68 69 70 71 72 73 74 75 76 77 78 79 80 81 |
#include "stdafx.h" #include <dlib/image_processing/frontal_face_detector.h> #include <dlib/image_processing/render_face_detections.h> #include <dlib/image_processing.h> #include <dlib/gui_widgets.h> #include <dlib/image_io.h> #include using namespace dlib; using namespace std; // ---------------------------------------------------------------------------------------- int main(int argc, char** argv) { try { // We need a face detector. We will use this to get bounding boxes for // each face in an image. frontal_face_detector detector = get_frontal_face_detector(); // And we also need a shape_predictor. This is the tool that will predict face // landmark positions given an image and face bounding box. Here we are just // loading the model from the shape_predictor_68_face_landmarks.dat file you gave // as a command line argument. shape_predictor sp; deserialize("shape_predictor_68_face_landmarks.dat") >> sp; image_window win, win_faces; // Loop over all the images provided on the command line. //for (int i = 2; i < argc; ++i) //{ //cout << "processing image " << argv[i] << endl; array2d img; string img_path = "got.jpg"; //load_image(img, argv[i]); load_image(img, img_path); // Make the image larger so we can detect small faces. pyramid_up(img); // Now tell the face detector to give us a list of bounding boxes // around all the faces in the image. std::vector dets = detector(img); cout << "Number of faces detected: " << dets.size() << endl; // Now we will go ask the shape_predictor to tell us the pose of // each face we detected. std::vector shapes; for (unsigned long j = 0; j < dets.size(); ++j) { full_object_detection shape = sp(img, dets[j]); cout << "number of parts: "<< shape.num_parts() << endl; cout << "pixel position of first part: " << shape.part(0) << endl; cout << "pixel position of second part: " << shape.part(1) << endl; // You get the idea, you can get all the face part locations if // you want them. Here we just store them in shapes so we can // put them on the screen. shapes.push_back(shape); } // Now let's view our face poses on the screen. win.clear_overlay(); win.set_image(img); win.add_overlay(render_face_detections(shapes)); // We can also extract copies of each face that are cropped, rotated upright, // and scaled to a standard size as shown here: dlib::array<array2d > face_chips; extract_image_chips(img, get_face_chip_details(shapes), face_chips); win_faces.set_image(tile_images(face_chips)); cout << "Hit enter to process the next image..." << endl; cin.get(); //} } catch (exception& e) { cout << "\nexception thrown!" << endl; cout << e.what() << endl; } } |
- Run, if there is error:
“USER_ERROR__missing_dlib_all_source_cpp_file__OR__inconsistent_use_of_DEBUG_or_ENABLE_ASSERTS_preprocessor_directives”- Go to C:\Users\xmeng525\Dropbox\OPENCV_STUDY\dlib-19.4\dlib\threads\threads_kernel_shared.h
- Comment the following code:
12345678//#ifdef ENABLE_ASSERTS// extern int USER_ERROR__missing_dlib_all_source_cpp_file__OR__inconsistent_use_of_DEBUG_or_ENABLE_ASSERTS_preprocessor_directives;// inline int dlib_check_consistent_assert_usage() { USER_ERROR__missing_dlib_all_source_cpp_file__OR__inconsistent_use_of_DEBUG_or_ENABLE_ASSERTS_preprocessor_directives = 0; return 0; }//#else// extern int USER_ERROR__missing_dlib_all_source_cpp_file__OR__inconsistent_use_of_DEBUG_or_ENABLE_ASSERTS_preprocessor_directives_;// inline int dlib_check_consistent_assert_usage() { USER_ERROR__missing_dlib_all_source_cpp_file__OR__inconsistent_use_of_DEBUG_or_ENABLE_ASSERTS_preprocessor_directives_ = 0; return 0; }//#endif// const int dlib_check_assert_helper_variable = dlib_check_consistent_assert_usage();
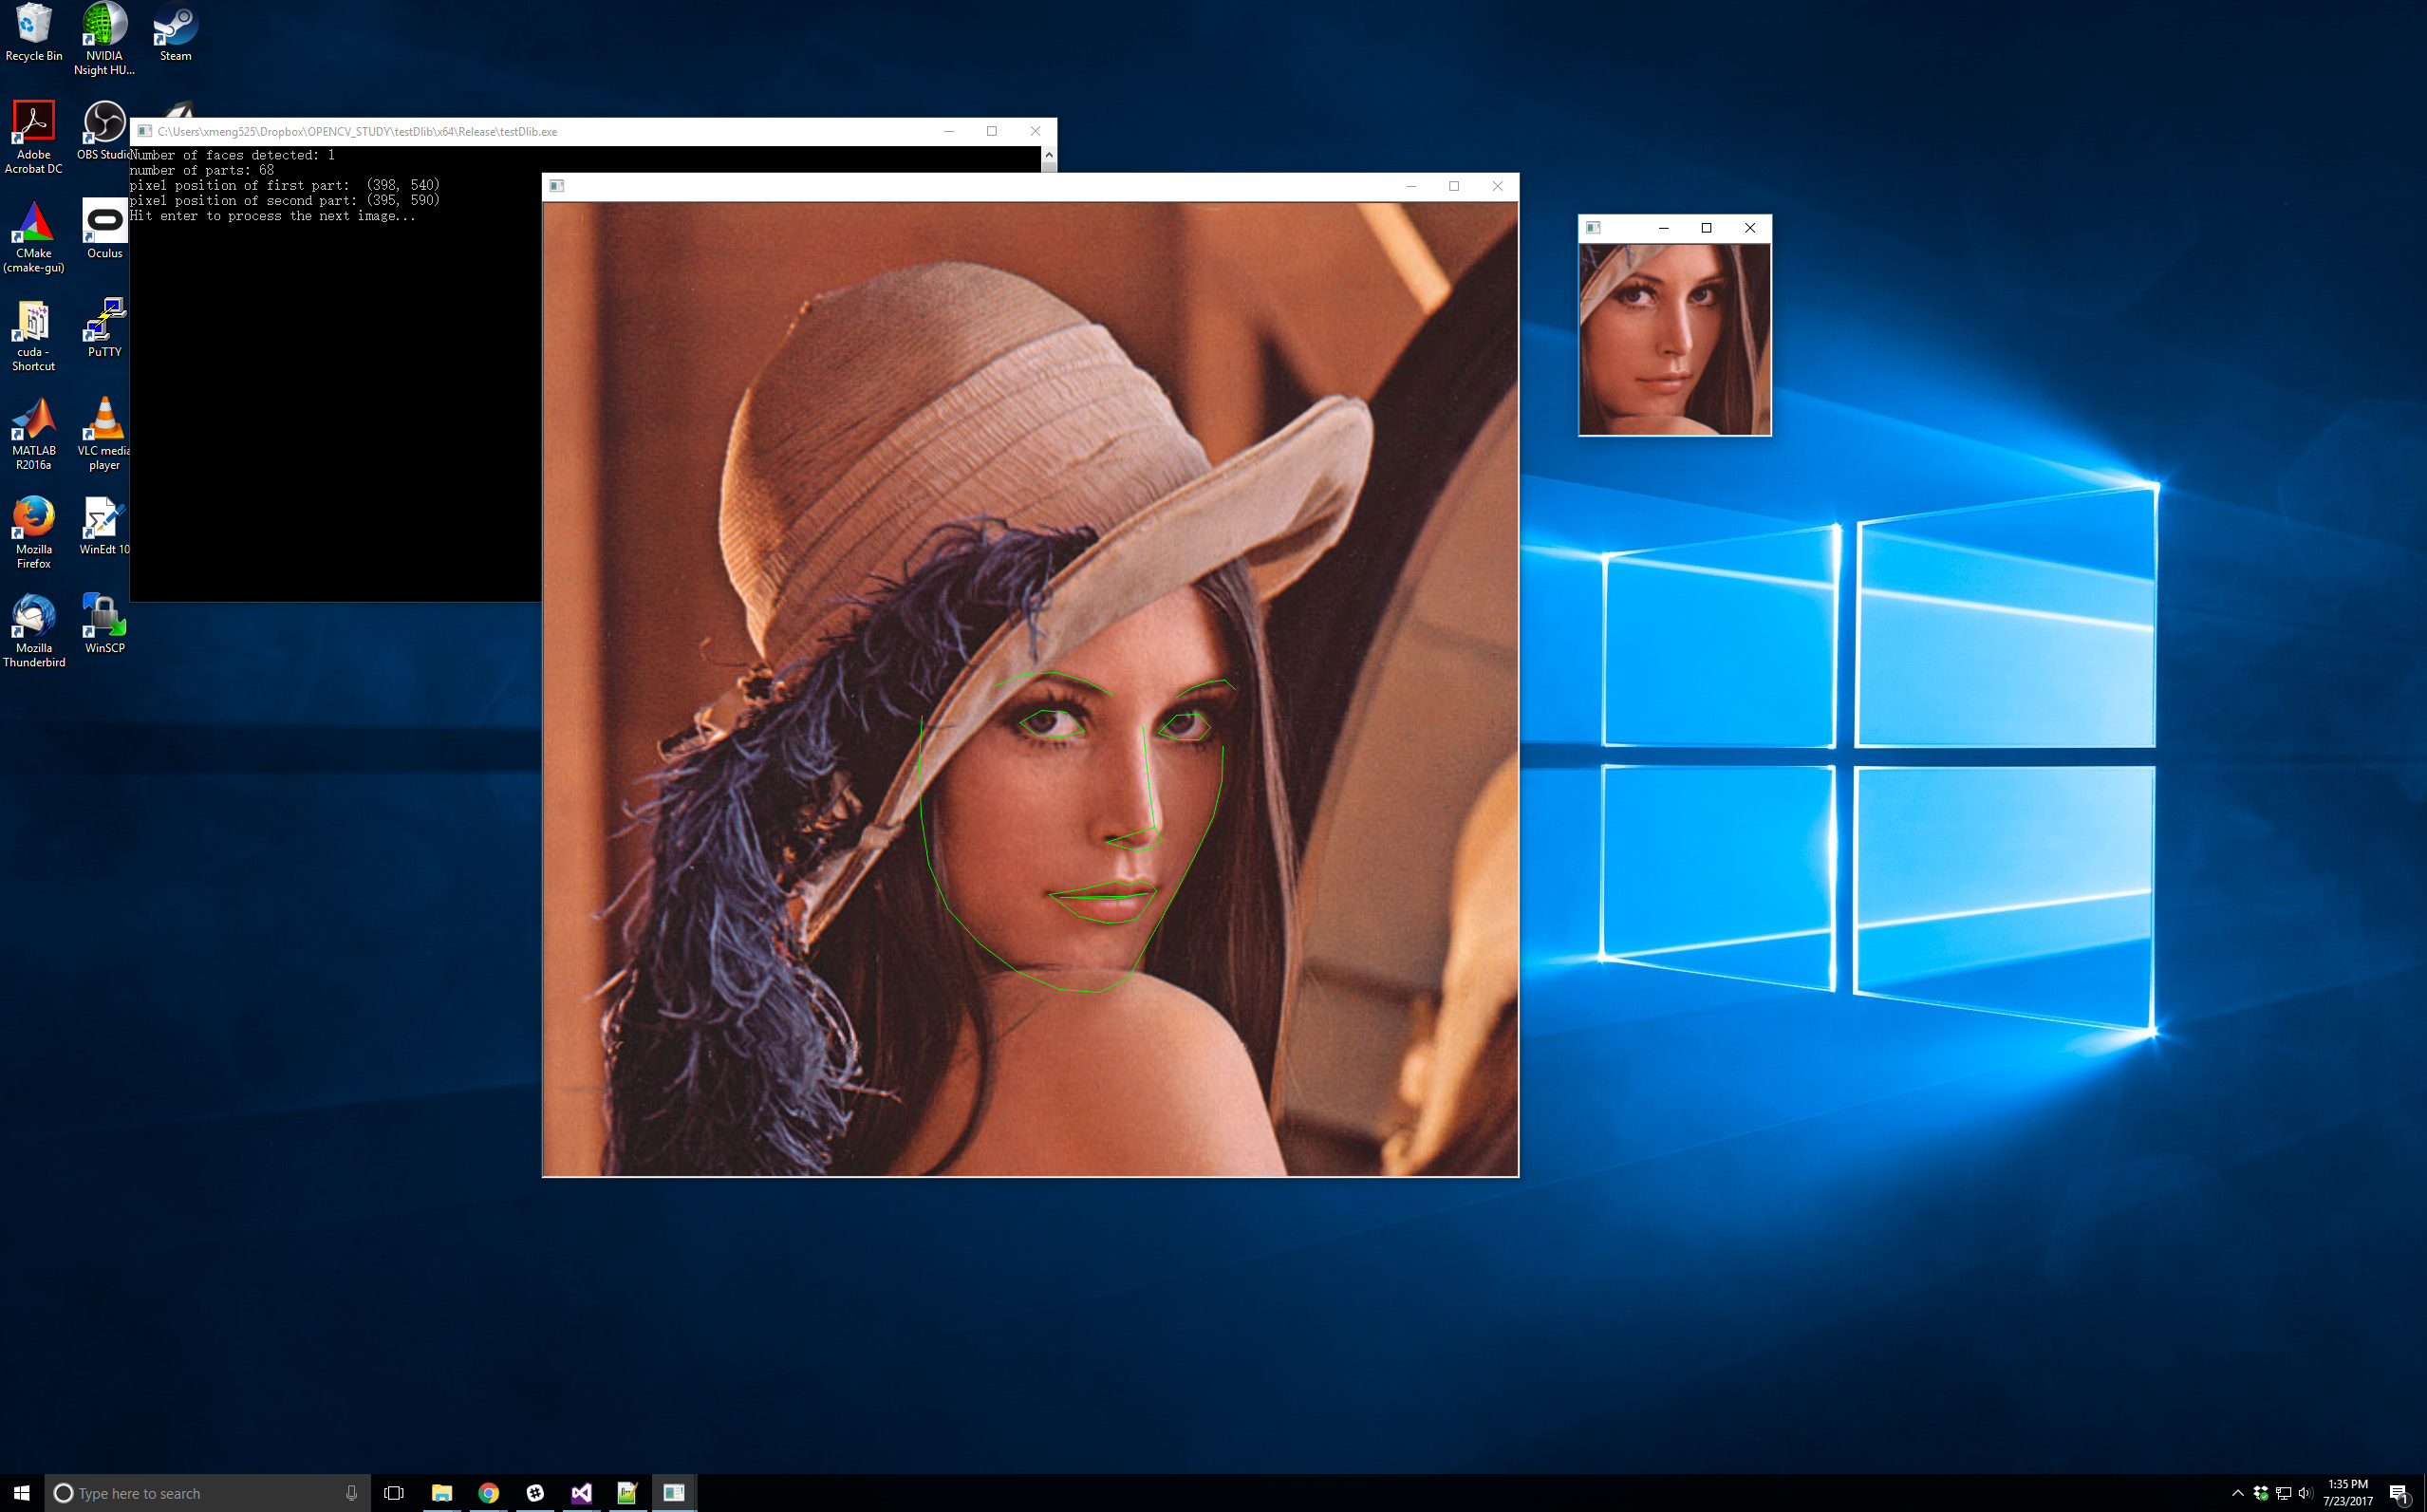
Step5: Get results

Hi Xiaoxumeng,
thank you for writing this tutorial. Unfortunately, the example code does not compile due to missing types in some vector and array2d definitions. You can copy those types from the official example here: http://dlib.net/face_landmark_detection_ex.cpp.html
Thank you for your tip! I’ll add it to my post.